> ## Documentation Index
> Fetch the complete documentation index at: https://agi-docs.pandas-ai.com/llms.txt
> Use this file to discover all available pages before exploring further.
# Quickstart
> Get up and running with PandaAGI SDK in under 5 minutes
This guide will help you get started with PandaAGI in two ways: using the **ready-made chat interface** for immediate results or integrating the **SDK in your Python code** for custom applications.
1. Visit [https://agi.pandas-ai.com/](https://agi.pandas-ai.com/) and sign in with GitHub
2\. Access your dashboard to get your API key
3\. Copy your API key for the next step
The fastest way to experience PandaAGI is through our ready-made chat interface:
```bash theme={null}
# Clone the repository
git clone https://github.com/sinaptik-ai/panda-agi.git
cd panda-agi/examples/ui
# Set your API key
echo "PANDA_AGI_KEY=your-api-key-here" > ./backend/.env
echo "TAVILY_API_KEY=your-tavily-api-key-here" >> ./backend/.env
echo "WORKSPACE_PATH=./workspace" >> ./backend/.env
# Start the application
./start.sh
```
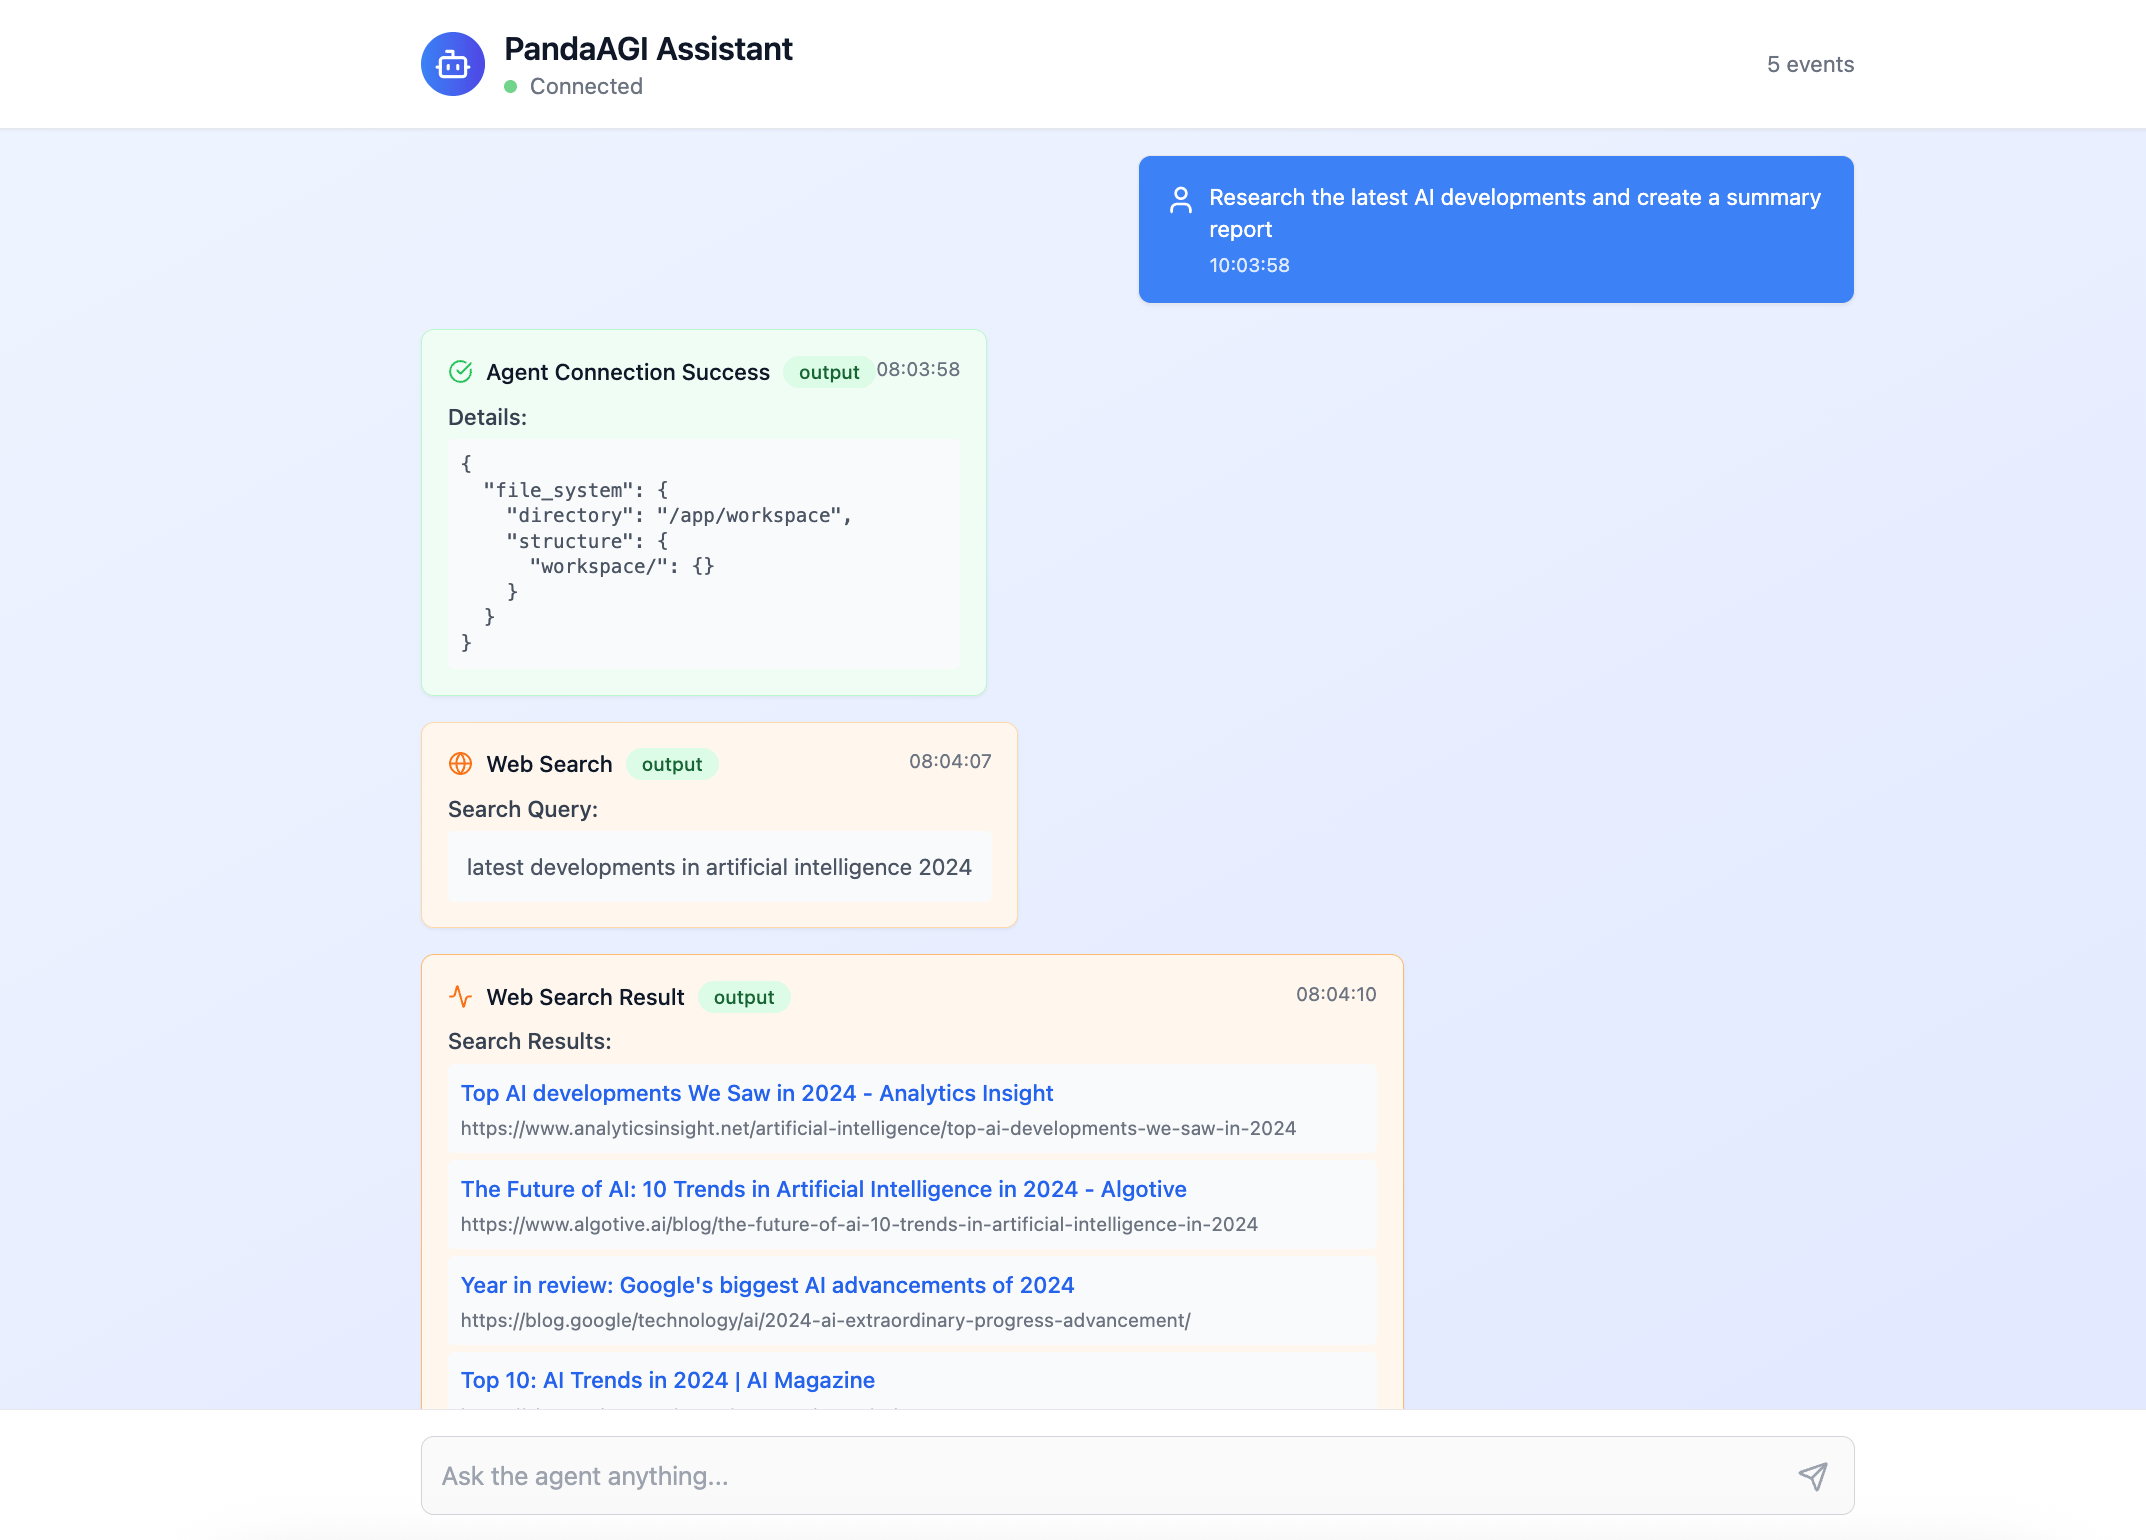
This launches a production-ready chat interface at [http://localhost:3000](http://localhost:3000)
Try these powerful prompts:
* "Research the latest AI developments and create a summary report"
* "Analyze this CSV data and create visualizations" (after uploading a file)
* "Design a database schema for an e-commerce platform"
Install the PandaAGI using your preferred package manager:
```bash pip theme={null}
pip install panda-agi
```
```bash poetry theme={null}
poetry add panda-agi
```
```bash uv theme={null}
uv pip install panda-agi
```
```bash conda theme={null}
conda install -c conda-forge panda-agi
```
**Required**: You must obtain an API key from [https://agi.pandas-ai.com/](https://agi.pandas-ai.com/) to use the PandaAGI SDK.
Set the `PANDA_AGI_KEY` and `TAVILY_API_KEY` environment variables in your .env file or directly in your code:
```python theme={null}
import os
os.environ['PANDA_AGI_KEY'] = 'your-api-key-here'
os.environ['TAVILY_API_KEY'] = 'your-tavily-api-key-here'
```
## Working with the SDK
The PandaAGI SDK connects you to a pre-configured autonomous general AI agent with built-in capabilities for web browsing, file system access, and code execution. You simply submit tasks and receive results:
### Quick introduction to use the SDK
Try it out yourself!
## Working with the Chat Interface (UI)
PandaAGI includes a production-ready chat interface that lets you interact with your AI agent without writing any code. This is perfect for:
* Quickly demonstrating AI capabilities to stakeholders
* Testing different prompts and use cases
* Providing a polished UI for non-technical users
* Learning how the agent thinks and uses tools
### Features of the Chat UI
See agent responses, thinking, and actions as they happen
Upload files for the agent to analyze or process
Maintain context across multiple interactions
Works seamlessly on desktop and mobile devices
### Running the Chat Interface
```bash theme={null}
# Navigate to the UI example directory
cd examples/ui
# Set your API key in .env file
echo "PANDA_AGI_KEY=your-api-key-here" > .env
echo "TAVILY_API_KEY=your-tavily-api-key-here" >> .env
echo "WORKSPACE_PATH=./workspace" >> .env
# Start with Docker Compose
./start.sh
```
This launches:
* Frontend: [http://localhost:3000](http://localhost:3000)
* Backend API: [http://localhost:8001](http://localhost:8001)
```bash theme={null}
# Backend
cd examples/ui/backend
pip install -r requirements.txt
python main.py
# Frontend (in new terminal)
cd examples/ui/frontend
yarn install
yarn start
```
Want to customize the chat interface? Check out the [Chat Interface Guide](/chat-interface) for detailed documentation on how to extend and modify the UI.
## Advanced Configuration
### Custom Environment
You can configure your AI agent with different execution environments:
```python theme={null}
from panda_agi.envs import LocalEnv, DockerEnv
# Use local environment (limited capabilities but no Docker required)
local_env = LocalEnv("./workspace")
# Use Docker environment (full capabilities, requires Docker)
docker_env = DockerEnv("./workspace")
agent = Agent(environment=docker_env)
```
### Conversation Management
Manage conversation state for multi-turn interactions:
```python theme={null}
from panda_agi.handlers import LogsHandler
from panda_agi.envs import DockerEnv
# Create event handler
handlers = [LogsHandler(use_colors=True, show_timestamps=True)]
# Create agent with conversation ID for persistence
agent = Agent(
environment=DockerEnv("./workspace"),
conversation_id="unique-conversation-id",
event_handlers=handlers
)
# First interaction
response1 = await agent.run("Find information about electric vehicles")
print(f"First task completed: {response1.output}")
# Later interaction (continues the same conversation)
response2 = await agent.run("Now compare the top 3 models")
print(f"Second task completed: {response2.output}")
```
### Accessing Agent Attachments
The `AgentResponse` object provides access to files created or referenced by the agent:
```python theme={null}
from panda_agi import Agent
from panda_agi.envs import DockerEnv
async def handle_attachments():
agent = Agent(environment=DockerEnv("./workspace"))
response = await agent.run("Create a Python script that generates a CSV report")
# Access the final output message
print(f"Agent response: {response.output}")
# Access any files created by the agent
if response.attachments:
print(f"Agent created {len(response.attachments)} file(s):")
for file_path in response.attachments:
print(f" 📄 {file_path}")
# You can now read or process these files
with open(file_path, 'r') as f:
content = f.read()
print(f"File size: {len(content)} characters")
else:
print("No files were created by the agent")
await agent.disconnect()
```
### Event Handling
Filter and process specific event types for custom UIs:
```python theme={null}
from panda_agi import BaseHandler, EventType
from panda_agi.client.models import BaseStreamEvent
class CustomEventHandler(BaseHandler):
def process(self, event: BaseStreamEvent) -> None:
if event.type == EventType.THINKING:
print(f"Agent is thinking: {event.data}")
elif event.type == EventType.ACTION:
print(f"Agent is taking action: {event.data}")
elif event.type == EventType.RESULT:
print(f"Agent produced result: {event.data}")
# Use custom handler
handler = CustomEventHandler("CustomUI")
response = await agent.run("Create a data visualization", event_handlers=[handler])
```
## Next Steps
Now that you're up and running with PandaAGI, explore these resources to learn more:
Build your own agentic chat application
Extend your agent's capabilities with custom functions
Guide your agent's behavior with contextual information
 Try these powerful prompts:
* "Research the latest AI developments and create a summary report"
* "Analyze this CSV data and create visualizations" (after uploading a file)
* "Design a database schema for an e-commerce platform"
Try these powerful prompts:
* "Research the latest AI developments and create a summary report"
* "Analyze this CSV data and create visualizations" (after uploading a file)
* "Design a database schema for an e-commerce platform"
